初学Vue3
最近正在学习 Vue3,尝试把一些重点和踩过的坑给记录下来。
准备
首先我们使用npm init vue@latest来创建一个 Vue3 项目,本文所使用的是 Ts+Vite 的组合,开发工具为 Vscode,Vscode 推荐使用插件Vue Language Features(Volar),这个插件改过名称,实际就是官方推荐的 Volar。另外请关闭 Vetur 等连体插件,因为 Volar 已经集成 Vetur 的功能,而且 Vetur 在使用script setup 语法糖导入组件时会报其未使用的错误。
如果你使用的是 Chrome 浏览器的话可以安装Vue.js devtools(记得先关闭 Vue2 的扩展)
vscode所使用的的插件
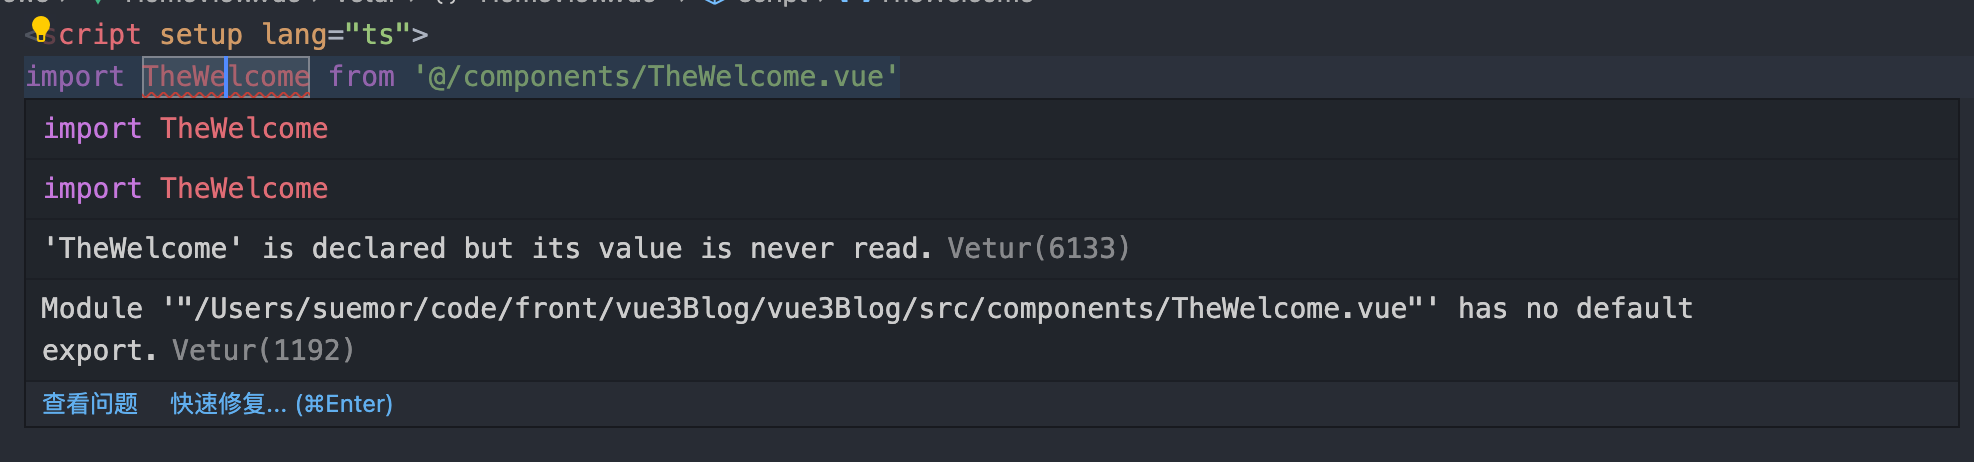
使用Vetur的错误
浏览器Vue3的扩展
组合式 API
组合式 API 介绍
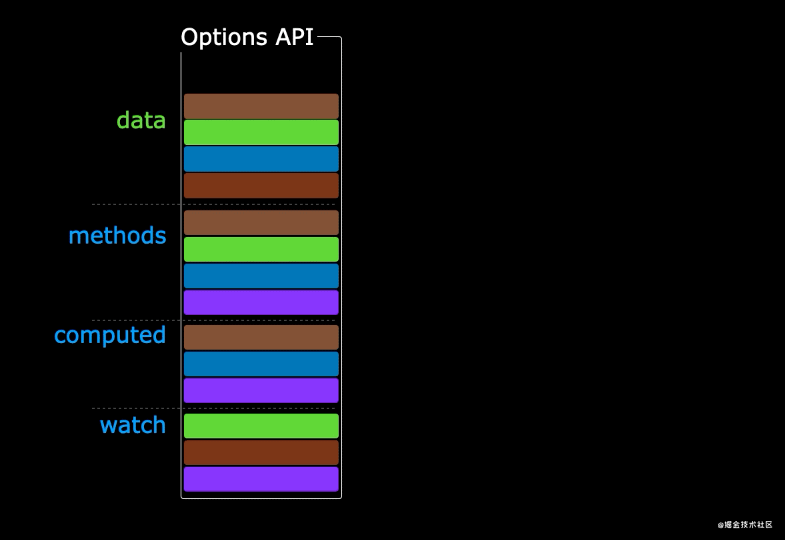
Vue3 一个很重要的特性那便是从选项式 API -> 组合式 API的转变, 虽然选项式 API 使用 (data、computed、methods、watch) 组件选项来组织逻辑通常都很有效,但是当我们的组件开始变得更大时,逻辑关注点的列表也会增长,这会导致组件难以阅读和理解,从而使项目变得越来越难以维护(就是选项式 API 逻辑太分散了,项目做大后不利于维护)。
这次新增加的组合式 API 中,它将同一个功能的逻辑和数据放置在了一起,使同一个的功能代码更加聚合。
02.gif
setup 函数简单介绍
因此在 Vue3.0 版本中组合式 API 便出现 setup 函数的写法
//undefined //beforeCreate
<script lang="ts">
  export default {
    setup() {
      console.log(this);
    },
    beforeCreate() {
      console.log("beforeCreate");
    },
  };
</script>会发现最终输出的结果为undefined和beforeCreate,我们可以得出如下结论
setup函数在任何生命周期函数之前执行setup函数中你应该避免使用this,因为它不会找到组件实例
<script lang="ts">
  export default {
    setup() {
      let count = 1;
      return {
        count,
      };
    },
  };
</script>

<template>
  <h1>{{count}}</h1>
  <button @click="count++">+1</button>
</template>你会发现1顺利的在你屏幕上显示出来,但是你无论怎么按 button 你的数据都不会发生变化,我们可以得出如下结论
- setup 中函数定义变量或者对象要写在 return 中,才可以在模板中使用
- 我们创建的数据并不是响应式的
注意:但是如果你在 Vscode 中如此输入代码的话,template 模板中可能会报找不到名称“xxxx”的错误,这是因为在 Vue3.2 中出现了script setup 语法糖的写法导致数值无法被 Volar 读取(下方为案例 script setup 语法糖方式的重写)。
//与上方代码完全相同
<script setup lang="ts">
  let count = 1;
</script>

<template>
  <h1>{{ count }}</h1>
  <button @click="count++">+1</button>
</template>可以很明显的发现script setup 语法糖有着更少的样板内容,更简洁的代码,因此我们接下来的代码都会以script setup 语法糖方式来书写。
响应式组件 ref
我们还是使用上方累加的例子,如下我们把它改成响应式的
<script setup lang="ts">
  import { ref } from 'vue';
  let count = ref(1)
  count.value++
</script>

<template>
  <h1>{{ count }}</h1>
  <button @click="count++">+1</button>
</template>
<style>- ref 可以创建响应式数据,但不建议包含引用数据类型
- 在 TypeScript 中通过 value 属性才能读取或者修改数据。
- 在 template 模板中直接通过变量名称才能获取读取或者修改数据。
- 详情可见Vue3 官网-ref 的响应式变量
响应式组件 reactive
我们用 reactive 创建一个引用数据类型的响应式数据,并通过点击按钮改变它的值
<script setup lang="ts">
  import { reactive } from "vue";
  const person = reactive({
    name: "suemor",
    age: 18,
  });
  const changePerson = () => {
    (person.name = "小杰"), (person.age = 28);
  };
  // const name = reactive('小黄') 无效写法
</script>

<template>
  <button @click="changePerson">点我改变person属性</button>
  <ul>
    <li v-for="(item, index) in person" :key="index">{{item}}</li>
  </ul>
</template>- reactive 可以创建引用数据类型的响应式数据
- reactive 修改值并不需要通过
value - reactive 函数只能基于引用数据类型创建响应式数据,不能创建基本数据类型
- ref 在 Typescript 中使用时需要点上 value, 而 reactive 在 Typescript 中使用时不需要点上 value,在模板中使用时都不需要加 value
计算属性 computed
响应式 API 中 computed 和之前的 组合式 API 的 computed 选项用法类似,但需要先引入:import { computed } from "vue"
<script setup lang="ts">
  import { computed, ref } from 'vue';
  const num1 = ref(1)
  const num2= ref(1)
  const sum = computed(()=>num1.value + num2.value)
</script>

<template>
  <h1>{{sum}}</h1>//2
</template>
<style>- 需要先引入:
import { computed } from "vue" - 回调函数的返回值就是计算结果
监听状态 watch
watch 函数用于监听响应式数据的变化,下面的示例演示了如何使用watch
<script setup lang="ts">import {watch,reactive, ref } from 'vue';
  const person = ref('')
  watch(person,(oldValue,newValue)=>{
    console.log(oldValue,newValue);
  })
</script>

<template>
  <input v-model="person" type="text" placeholder="请输入姓名">
</template>
<style>- 需要先引入:
import { watch } from "vue" - 用于监听响应式数据的变化
defineProps 和 defineEmits
在 <script setup> 中必须使用 defineProps 和 defineEmits API 来声明 props 和 emits 。因为我们使用了 Typescript,所以我们可以尝试使用纯类型声明来声明 props 和 emits
子组件
<template>
  <h1>{{ props.msg }}</h1>
  <button @click="handleClick">点击我调用父组件方法</button>
</template>
<script setup lang="ts">
  //props
  const props = withDefaults(
    defineProps<{
      msg?: string;
    }>(),
    {
      msg: "我是默认值",
    }
  );

  //emits
  const emit = defineEmits<{
    (e: "on-change", data: string): void;
  }>();
  const handleClick = () => emit("on-change", "父组件方法被调用了");
</script>
父组件
<script setup lang="ts">
  import { ref } from "vue";
  import TestPropsEmit from "./views/TestPropsEmit.vue";
  const msg = ref("我是来自父组件的值");
  const handleChange = (data: string) => {
    console.log(data);
  };
</script>

<template>
  <TestPropsEmit :msg="msg" @on-change="handleChange" />
</template>
最终结果如下图
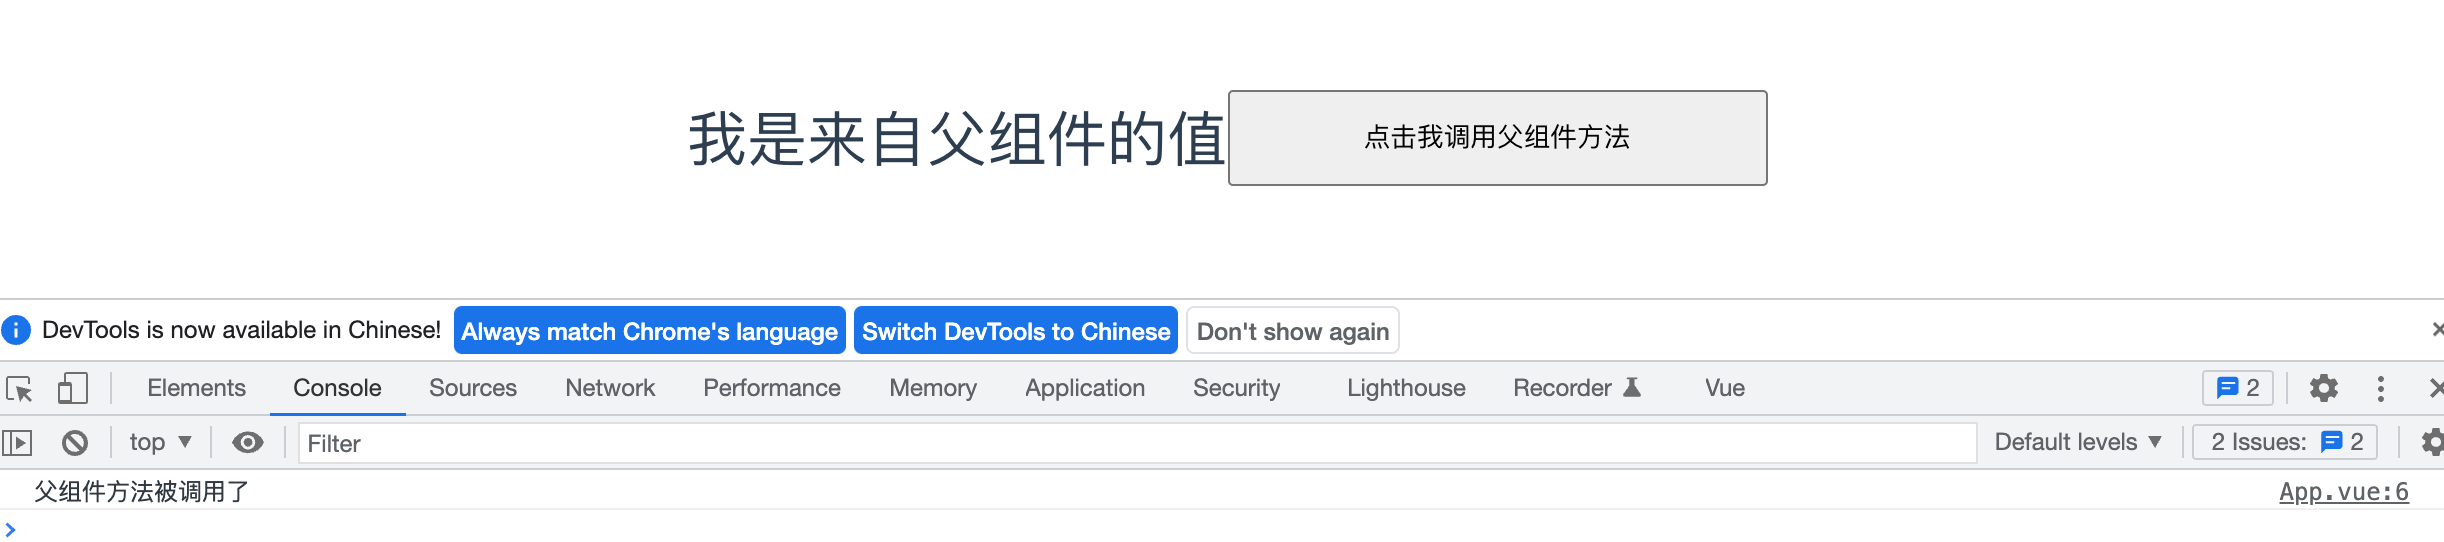
image-20220203154838247
defineProps和defineEmits都是只在<script setup>中才能使用的编译器宏。他们不需要导入且会随着<script setup>处理过程一同被编译掉。defineProps和defineEmits在选项传入后,会提供恰当的类型推断。- 通过
withDefaults可以给props提供默认值